 |
|
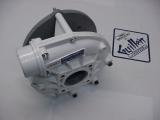
"POWER PRO" WHITE PUMP
ASSEMBLY HISTORY & SPECIFICATIONS |
| POWER PRO
WHITE PUMP |
|
POWER PRO WHITE PUMP'S
MOTOR |
|
Original |
HP |
Upgraded |
HP |
Original |
HP |
Amps |
Upgraded |
HP |
Amps |
Volt |
Speed |
Used in: |
|
4580000 |
0.5 |
8501000 |
0.75 |
2095000 |
0.5 |
Spec |
2552000 |
0.75 |
Spec |
Dual |
1 |
Bath & Spa |
|
4634000 |
0.75 |
9011000 |
1.0 |
2812000 |
0.75 |
Spec |
2812000 |
1.0 |
Spec |
115 |
2 |
Bath-Spa & Spa |
|
4634000 |
0.75 |
9011000 |
1.0 |
2987000 |
0.75 |
Spec |
2987000 * |
1.0 |
Spec |
230 |
2 |
In-Ground Spa |
|
4582000 |
1.0 |
8502000 |
1.5 |
4592000 |
1.0 |
Spec |
8654000 |
1.5 |
Spec |
Dual |
1 |
Bath Only |
|
4583000 |
1.5 |
8566000 |
2.0 |
4593000 |
1.5 |
Spec |
2554000 |
2.0 |
Spec |
Dual |
1 |
Bath & Spa |
|
4583000 |
1.5 |
8566000 |
2.0 |
3645000 |
1.5 |
Spec |
3645000 * |
2.0 |
Spec |
230 |
2 |
In-Ground Spa |
|
8564000 |
Use |
8501000 |
0.75 |
*
= Discontinued
Warning:
Dual Voltage Motor may arrive with 230v Setting and the
Identification Sticker may be covered with a Black Film.
Just remove it |
|
8565000 |
Use |
9011000 |
1.0 |
|
PR JRI 60 421
= Manufacturer's Casting Number for all White Pump's Face or
Volute = Not an Ordering Number |
Note:
White Pump do not includes the
4516000 Flange which is glued to the Discharge End
Good Practice to replace both Pump Gaskets
0199000
Jacuzzi White Pump Removal Help:
1- Remove Pump Assembly from the unit.
2- Remove the 4 3/8" bolts holding the Gray Plate to the motor.
3- Remove the Shaft Cover at the rear of motor, exposing the
Slot in the Shaft.
4- Hold the Shaft with a Flat Screwdriver or Flat end tool.
5- With a small pipe wrench or Channel Lock Pliers, turn the
plastic sleeve between the legs of pump (CC wise)
May also use a screwdriver and turn the Impeller, this may
damage the pump.
There may be a Hex plastic in the impeller and a socket
wrench may be used
6- Only a slight turn will break loose the hold, the rest will
turn easily by hand. (Most of the time)
7- Align the Flange to the Discharge and install it with All
Purpose PVC Cement.
8- Reverse the process for installing the pump. |